Materials give the surface properties to 3D objects, which are then projected to an image. Therefore, it is crucial to understand what features materials can provide, especially in a non-photorealistic rendering context where everything is possible.
The mnpr_uber material is developed to meet most painterly shading requirements in real-time. Built using the ShaderFX framework, it is entirely contained within the node-based ShaderFX Graph and can be modified to fit any shading requirements by look development artists. However, most settings and attributes are easily accessible from the Attribute Editor when the material is selected, as shown below.
A ShaderFX material has two types of ‘attributes’: Settings and Attributes. They work differently so consider them as separate entities.
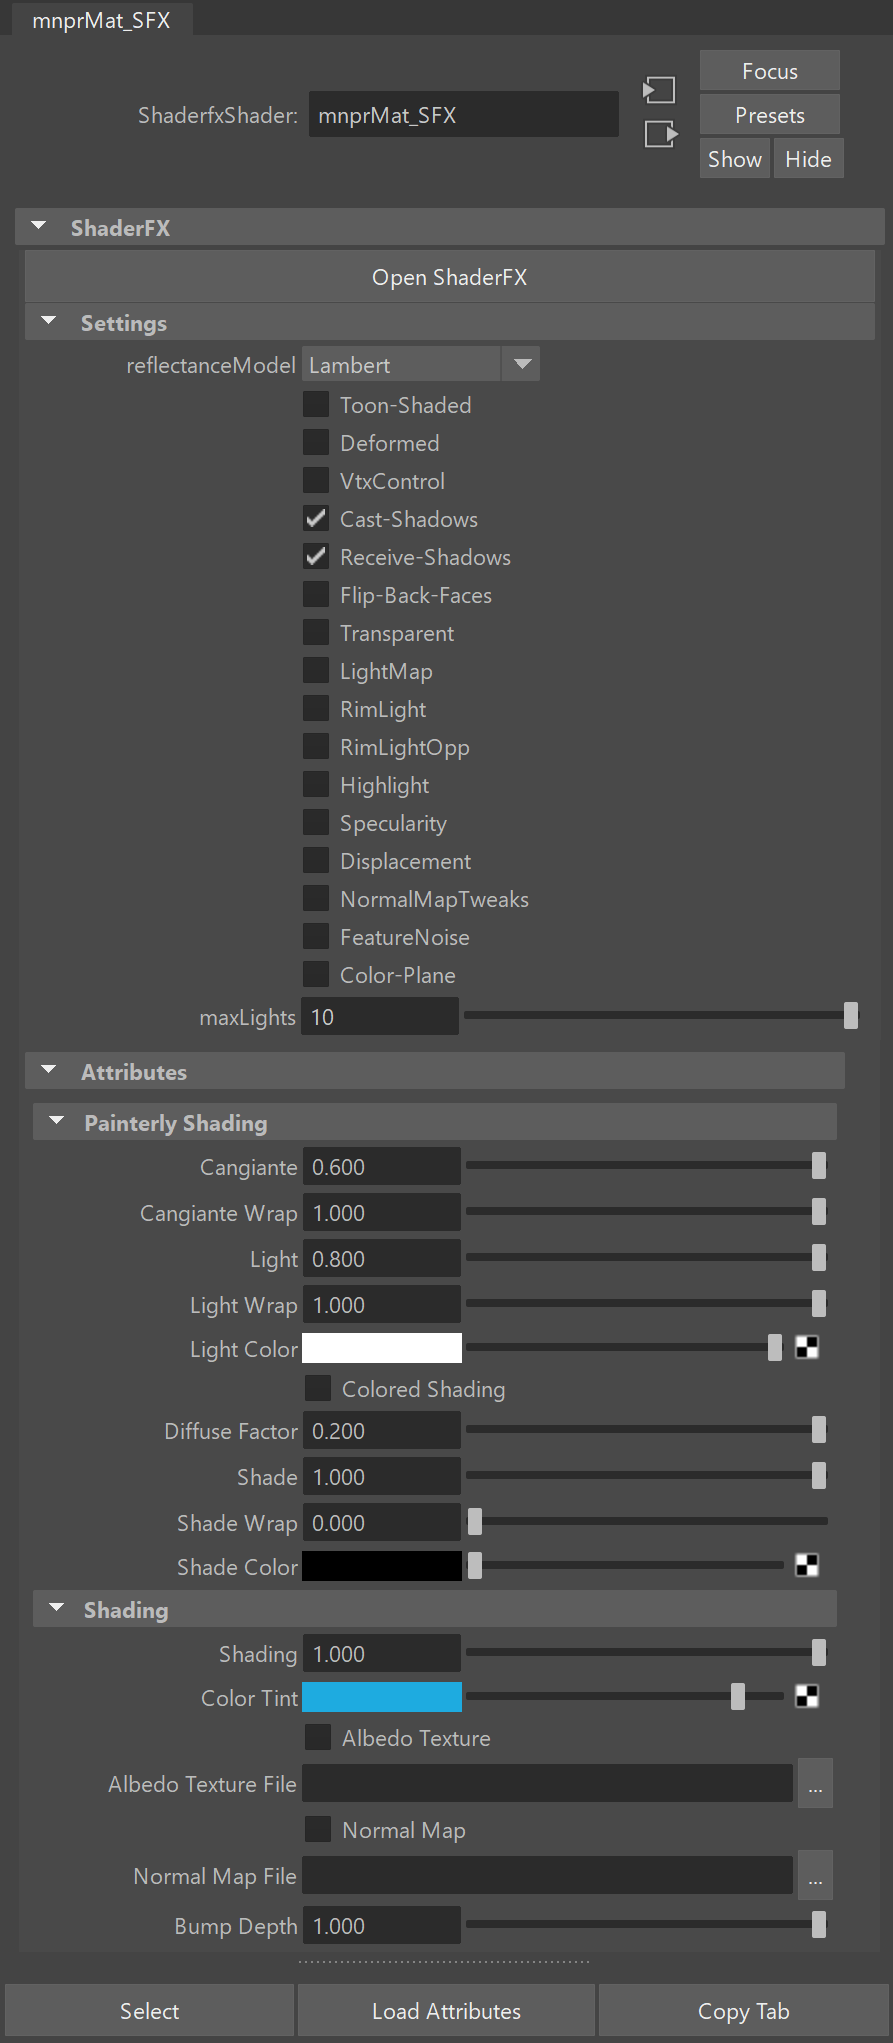
The first element within the mnpr_uber material is the Open ShaderFX button, which opens the ShaderFX Graph. This graph allows complete control to customize the material with nodes. The graph is intended for shader writers or advanced users who know how to manipulate and work with the ShaderFX framework. Using the ShaderFX framework is outside of the scope of this documentation, but you can learn a lot by watching these tutorials and reading the advanced documentation.
The first section, when opened, provides the material Settings that allow to customize what optional features the mnpr_uber material should have. The section is closed by default, as these settings enable/disable material properties. We’ll go into detail with each setting further on. Let us concentrate first on the default material Attributes.
Almost all attributes shown in the mnpr_uber material go between 0 and 1. The ShaderFX framework unfortunately maxes out the sliders of attributes at their default value if they are not 0.
Painterly Shading
Painterly shading attributes focus on bringing colors into the foreground of shading control and work differently than most attributes found in photorealistic renderers. This doesn’t mean that they can’t be combined with normal Shading parameters, but they require 3D artists to go back to thinking in terms of colors and light. The first group of attributes control the color in the lit parts of the objects, whereas the second group of attributes (from Colored Shading onwards) control the color in the shade of objects.
Cangiante
Cangiante illumination changes the hue of the lit area towards a brighter and saturated related color. This attributes can also be used to enhance the color of any applied Albedo Texture.
Cangiante Wrap
Cangiante Wrap defines the area of effect for the Cangiante illumination attribute.
Light
Light (prev. Dilute Paint) changes the color of the lit area towards the Light Color.
Light Wrap
Light Wrap (prev. Dilute Area) defines the area of effect for the Light attribute.
Light Color
Light Color (prev. Dilute Color) defines a custom color used by the Light and Highlight attributes.
Colored Shading
Colored Shading toggles colored shading of objects, which is then done with the Shade Color instead of black.
Diffuse Factor
Diffuse Factor defines the amount of diffuse shading within the material. 0 will be flat shading (entirely lit), 1 will be completely diffuse.
Shade
Shade (prev. Shade Wrap) changes the color of the shade area towards the Shade Color.
Shade Wrap
Shade Wrap defines the area of effect for the Shade attribute. It behaves like the Light Wrap, but for the shade of an object.
Shade Color
Shade Color defines a custom color used by the Colored Shading and the Shade attributes.
Shading
Shading attributes focus on common attributes found in photorealistic materials, including various uses of texture mapping for different shading effects. Further attributes can be shown in this section by enabling the Specularity and NormalMapTweaks Settings.
Shading
Shading defines the amount of shading within the material. 0 will be flat shading (entirely unlit), 1 will be shaded. It’s the opposite of Diffuse Factor and won’t affect lighting from Light Maps.
Color Tint
Color Tint defines a custom tint color. If no Albedo Textures are used, the color tint will define the overall color of the material. With textures, the color tint will multiply with the albedo texture to tint it accordingly. Leave the color tint white if you only want the color of the albedo texture.
Albedo Texture
Albedo Texture is an image which contains the raw colors of the object, without any lighting information. This attribute toggles the use of the Albedo Texture File.
Albedo Texture File
Specifies the file path to the Albedo Texture. The path can be absolute or relative to the project root directory.
Normal Map
Normal Map is an image which contains the normal inclination deviations of the surface in the red and green channels. This texture is used to add geometric detail through normal modulations.
Normal Map File
Specifies the file path to the Normal Map. The path can be absolute or relative to the project root directory.
Bump Depth
Defines the intensity of the normal inclinations in the Normal Map.
As not all normal maps are encoded the same way, there is a NormalMapTweaks setting that helps to invert the U or V direction of the normal map, if necessary.
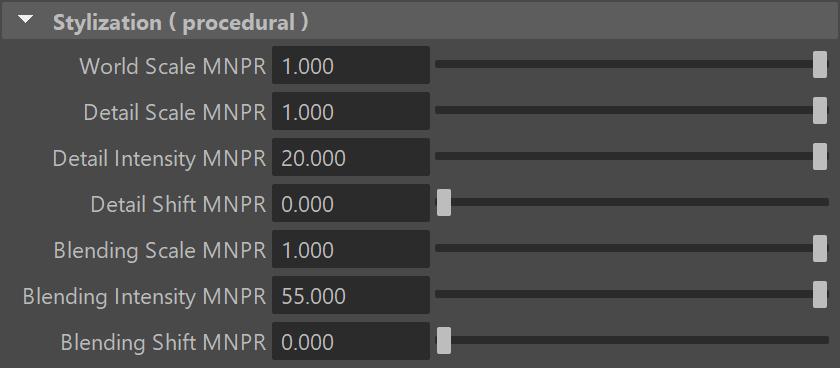
Stylization (proc.)
When the NoiseFX tool has been used on the material, the Stylization (procedural) section will appear at the bottom of the Attribute Editor. This section contains all the procedural attributes that the NoiseFX tool creates and modifies. Therefore, you can mostly ignore these attributes within the material.
Settings
Settings is the first section within the Attribute Editor, but it is closed by default. Once opened, each Setting allows you to customize what optional features the mnpr_uber material should have. Most of these settings are disabled by default, as to avoid unnecessary computations and clutter for artists. If needed, enabling settings will provide the necessary attributes to configure them.
Reflectance Model
The Reflectance Model setting defines the shading algorithm used by the mnpr_uber shader. A shading algorithm dictates how light is reflected along the surface of the object. Here is a visual comparison of each shading algorithm.
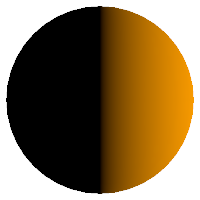
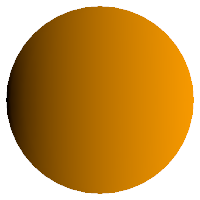
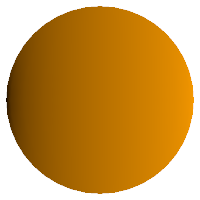
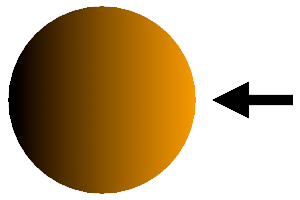
Some reflectance models may not be compatible with all material features on this documentation page. Only the Lambert reflectance model has been thoroughly tried and tested.
Deformed
The Deformed setting bakes the current position of vertices so that effects that rely on the 3D position of objects can stay in place when objects are animated/deformed. If this setting is not enabled, things like NoiseFX or FeatureNoise would float around in 3D space and not move with the objects.
VtxControl
The VtxControl setting enables the control of stylization effects through the vertex colors. This attribute is automatically managed by MNPRX and is activated as soon as you start using PaintFX.
Cast-Shadows
The Cast Shadows setting enables cast shadows of the material on other surfaces. If disabled, the objects with the material won’t cast any shadows onto other objects.
Receive-Shadows
The Receive Shadows setting enables receiving cast shadows from other objects on the material. If disabled, the objects with the material won’t receive shadows from other objects.
Flip-Back-Faces
The Flip-Back-Faces setting flips the normals of faces that might be pointing away from the camera view. This is useful to obtain better results for thin objects like leaves.
Transparency
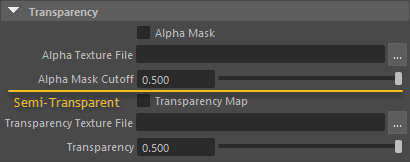
The Transparent setting enables the use of alpha masks in the material and unlocks the Semi-Transparent and Blend-All settings directly underneath.
Alpha Mask
Alpha Mask is a black and white image which embeds the alpha of the material. White is opaque, black is transparent. Use the alpha masks if you want that cast shadows respect the transparency.
Alpha Texture File
Specifies the file path to the Alpha Mask. The path can be absolute or relative to the project root directory. While similar to Transparency Map, the alpha mask is binary and can only distinguish between opaque or fully transparent.
Alpha Mask Cutoff
The grayscale value at which the Alpha Mask is transparent. Defines the boundary of the alpha mask in case there are grey values.
Transparency Map
Transparency Map is a greyscale image which embeds the semi-transparency of the material. This attribute toggles the use of the Transparency Texture File and is only available if the Transparent and Semi-Transparent setting have been enabled.
As with Alpha Masks: white is opaque, grey values are semi-transparent, black is transparent. The darker the value of the Transparency Map, the more transparent the material will be.
Transparency Texture File
Specifies the file path to the Transparency Map. The path can be absolute or relative to the project root directory.
Transparency
Transparency defines the overall semi-transparency of the material.
When working with Transparency Map or Alpha Mask, you can set the Transparency attribute to 0, as the textures will normally handle the transparency, instead.
Blend-All setting
The Blend-All setting (which shows up once the Semi-Transparency setting has been enabled) makes all underlaying data semi-transparent, blending it with whatever is underneath. While this setting is experimental, you can use it in case semi-transparent objects are having adverse effects on your renders.
LightMap
The Light Map setting enables the use of light maps within the material and creates a new section with light map attributes. Light maps are grayscale maps that define which parts of the material are lit. These can be baked from offline renderers, painted manually or set up procedurally using ShaderFX.

Light Map File
Specifies the file path to the Light Map. The path can be absolute or relative to the project root directory.
Shade in Light Map
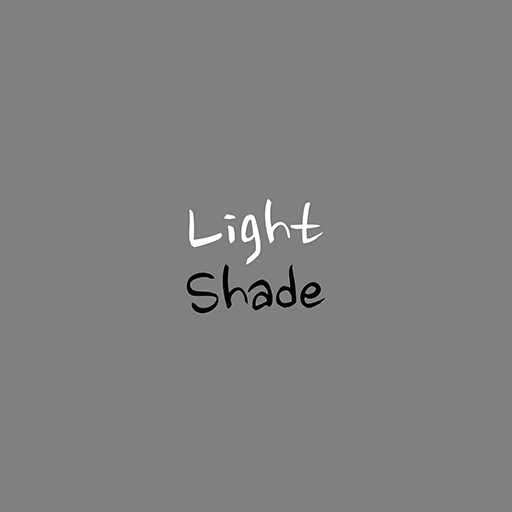
If this attribute is enabled, Light Maps will add both light and shade to the object. White 1.0 will add light, neutral grey 0.5 won’t add anything, black 0 will add shade to the object.
Rim light / Rim light opp.
The Rim Light and Rim light opp. settings control the appearance of the rim lighting effect around the silhouette of objects, on areas facing respectively away and towards the light. The settings described below are the same for both rim light (facing away) and rim light opposite (facing towards the light).
Rim Light
Rim Light controls the intensity of the rim light. A value of 0 means that the rim light is invisible.
Rim Light Wrap
Rim Light Wrap defines the area of effect of the rim light.
Rim Light Color
Controls the color of the rim light effect. The color is additively blended on top of the underlaying shading.
Highlight
The Highlight setting generates the Highlight Roll Off and Highlight Transparency attributes in the Painterly Shading material section. These attributes generate a sharp highlight with the Light Color.
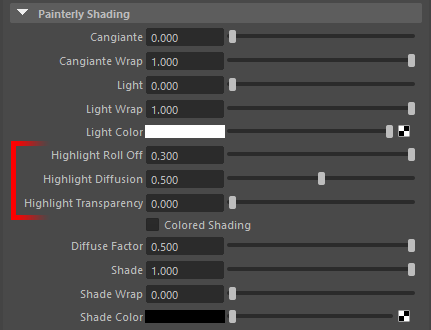
Highlight Roll Off
Highlight Roll Off defines the size of the highlight in the lit area of objects.
Highlight Diffusion
Highlight Diffusion defines how diffuse (blurred) the highlight should be.
Highlight Transparency
Highlight Transparency defines the transparency of the highlight.
Specularity
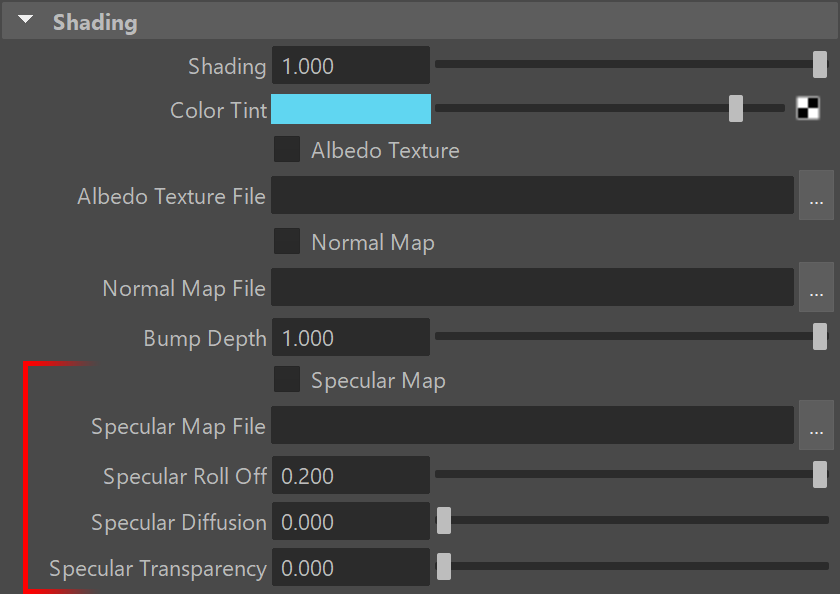
The Specularity setting enables the use of specular reflectance models within the material and creates new attributes within the Shading section. Once enabled, two new settings appear underneath: specularModel and Specular-In-Alpha (if the Transparent setting is also enabled).

specularModel
The specularModel setting defines the shading algorithm used by the mnpr_uber material for specularity (shininess). A shading algorithm dictates how light is reflected along the surface of the object.
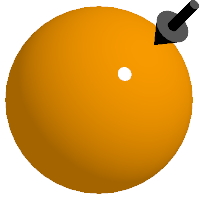
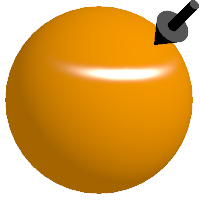
Depending on which specular model is selected, different specularity attributes will appear in the Shading section.
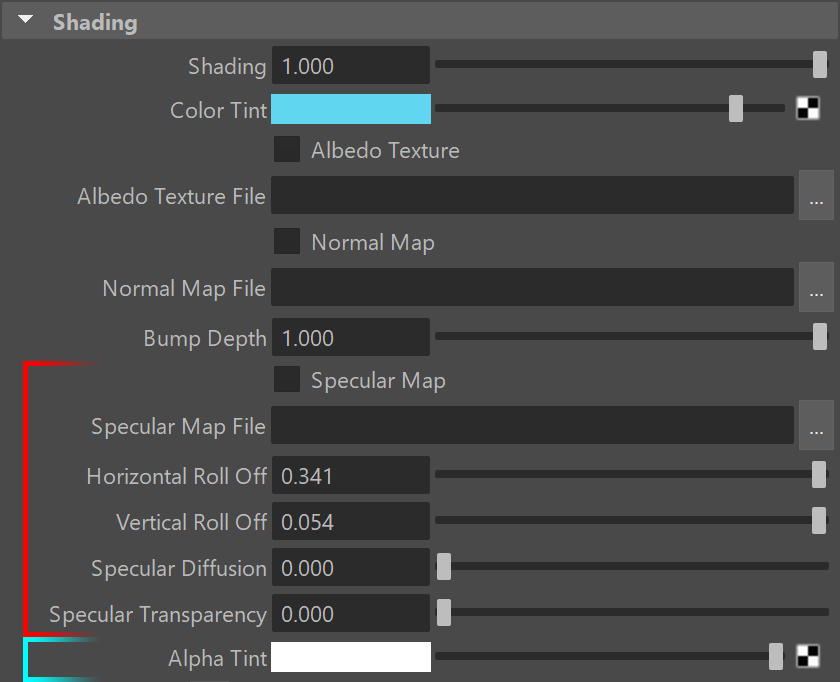
Specular Map
Specular Map is a greyscale image which defines the specularity within the material. Otherwise, the specularity will be even throughout the material. This attribute toggles the use of the Specular Map File.
The specularity within the specular map is encoded within the intensity (white values) of the texture. White is specular, grey is semi-specular, black is diffuse.
Specular Map File
Specifies the file path to the Specular Map. The path can be absolute or relative to the project root directory.
Roll Offs
Specular Roll Off, Horizontal Roll Off and Vertical Roll Off define the size of the specular highlight.
Specular Diffusion
Specular Deffusion defines how diffuse or sharp a specular highlight is.
Specular Transparency
Specular Transparency defines the transparency of the specular highlight.
Specular-In-Alpha
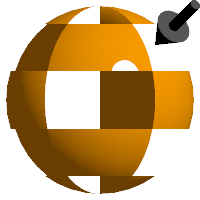
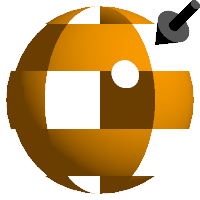
The Specular-In-Alpha setting is only visible if the Specularity and Transparent settings are enabled. The setting forces the specularity on the transparent parts of an object, which were set through the Alpha Mask attribute. The specular in alpha setting also generates the Alpha Tint attribute in the Shading section (cyan attribute)
Alpha Tint
Alpha Tint darkens the alpha parts of the material with a specified color. This attribute is especially useful for materials like tinted windows.
Displacement
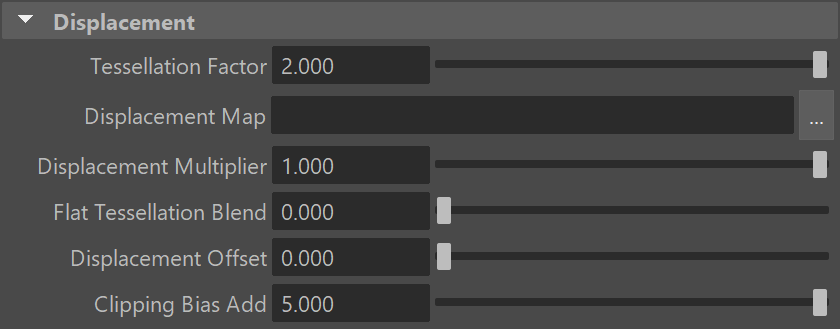
The Displacement setting enables the use of displacement within the material and creates a Displacement section with displacement attributes in the Attribute Editor. Once enabled, a new Setting also appears underneath: displacementModel.
displacementModel
The displacementModel setting defines the displacement algorithm used by the mnpr_uber shader. More importantly, it defines what kind of Displacement Map it expects. Depending on where you got your displacement map from, this becomes quite relevant. GrayScale is the simplest form of displacement map, in which the intensity of the map (white value) defines the amount of displacement given to the geometry.
Tessellation Factor
Tessellation Factor defines the amount of subdivision within each polygon. The higher the factor, the more polygons are subdivided, giving more points to displace. There is no magic number, so you will need to find out how much tessellation is enough for your displacement purposes depending on the topology of each model.
Displacement Map
Specifies the file path to the Displacement Map. The path can be absolute or relative to the project root directory. The displacement map is different depending on what displacementModel is selected in Settings.
Displacement Multiplier
Displacement Multiplier defines the amount of displacement to use. The higher the value, the more displacement there will be.
Flat Tessellation Blend
Flat Tessellation Blend defines the amount of flatness within the tessellations (subdivisions). By default, tessellations smoothen the transitions between flat polygons, unless specified through this attribute.
Displacement Offset
Displacement Offset offsets parts of the displacement inward, instead of only outward.
Clipping Bias Add
Clipping Bias Add defines a small default value to avoid vertices clipping away from light view during the shadow map calculations.
NormalMapTweaks
The NormalMapTweaks setting enables more refined control over the Normal Map by creating the Invert U and Invert V attributes within the Shading section.
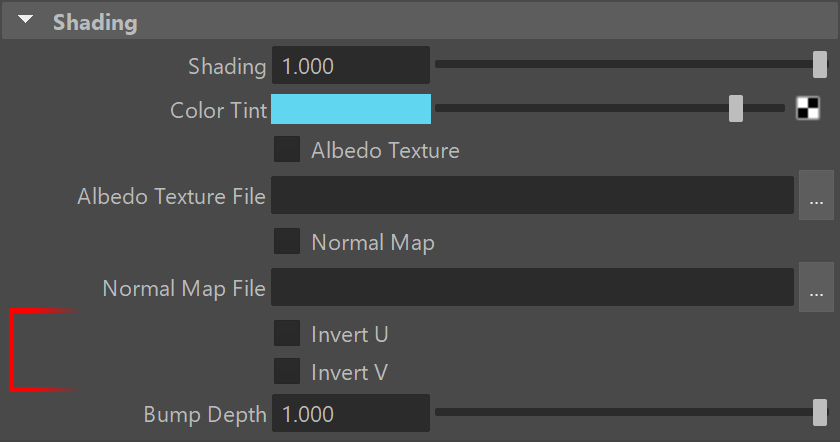
Invert
Invert U and Invert V invert the normal inclinations either horizontally or vertically, respectively.
FeatureNoise
The FeatureNoise setting creates fractalized 3D noise that is used for styles that require it i.e., hatching.
Color-Plane
The Color-Plane setting defines a material as a color plane. Objects assigned to a color plane material won’t be affected by the Atmosphere Color attribute that is set in the configuration node. This allows you to use color planes at different distances from the camera, without any atmospheric tint affecting them.
maxLights
The maxLights setting defines the maximum amount of lights considered by the material for its calculations.
Advanced
Modifying nodes inside of the ShaderFX material
- Open the ShaderFX graph within the desired material.
- Change the CustomGraph node at the top-level from
falsetotrue. This will avoid overwriting your changes upon a ShaderFX update. - Modify the material to your heart’s content and create your own ShaderFX material, if needed.
Set your own NoiseFX algorithms within the mnpr_uber material
- Remember which attribute is being modified within the material’s Stylization (procedural) section when modifying the desired NoiseFX values.
- Open the ShaderFX graph within the desired material.
- Navigate to:
Material -> ForwardRenderPasses -> Color-DiffusePass -> Control Sets -> Procedural Control -> X Procedural, whereXis the procedural attribute that modifies the desired effect. - Depending on what kind of noise algorithm you use, you can hook up your own nodes within the Noise2D or Noise3D node.
Create your own ShaderFX materials
You can create your own ShaderFX materials and continue using the MNPRX tools with them.
- Modify the mnpr_uber material to create your custom ShaderFX network.
- At the top-level of the ShaderFX material, set the desired name of the graph in the GraphName node.
- If previously modified, change the CustomGraph node from
truetofalse. This will enable quick ShaderFX updates in the future for materials with your graph name. - Export the entire graph
File->Export GraphintoMNPRX->shadersunder the new graph name. - Create a new preset with the mPre tool
Every time you load your preset, your shaderfx graph will now be loaded.
- Painterly Shading
- Shading
- Stylization (proc.)
- Settings
- Advanced